Those of you itching to open your text editor and lay down some PHP will be happy to know today will get us into some development. We will define the Jobeet data model, use an ORM to interact with the database, and build the first module of the application. But as symfony does a lot of the work for us, we will have a fully functional web module without writing too much PHP code.
The Relational Model
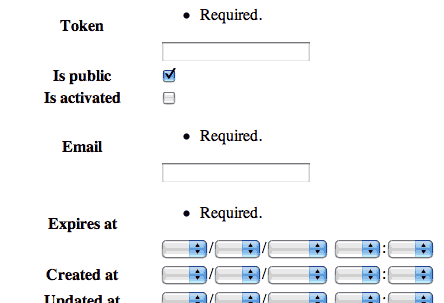
The user stories we saw yesterday describe the main objects of our project: jobs, affiliates, and categories. Here is the corresponding entity relationship diagram:

In addition to the columns described in the stories, we have also added a
created_at field to some tables. Symfony recognizes such fields and sets the
value to the current system time when a record is created. That's the same for
updated_at fields: Their value is set to the system time whenever the record
is updated.
The Schema
To store the jobs, affiliates, and categories, we obviously need a relational database.
But as symfony is an Object-Oriented framework, we like to manipulate objects whenever we can. For example, instead of writing SQL statements to retrieve records from the database, we'd rather prefer to use objects.
The relational database information must be mapped to an object model. This can be done with an ORM tool and thankfully, symfony comes bundled with two of them: Propel and Doctrine. In this tutorial, we will use Propel.
The ORM needs a description of the tables and their relationships to create the related classes. There are two ways to create this description schema: by introspecting an existing database or by creating it by hand.
note
Some tools allow you to build a database graphically
(for instance Fabforce's Dbdesigner)
and generate directly a schema.xml (with DB Designer 4 TO Propel Schema
Converter).
As the database does not exist yet and as we want to keep Jobeet database
agnostic, let's create the schema file by hand by editing the empty
config/schema.yml file:
# config/schema.yml
propel:
  jobeet_category:
    id:           ~
    name:         { type: varchar(255), required: true, index: unique }

  jobeet_job:
    id:           ~
    category_id:  { type: integer, foreignTable: jobeet_category, foreignReference: id, required: true }
    type:         { type: varchar(255) }
    company:      { type: varchar(255), required: true }
    logo:         { type: varchar(255) }
    url:          { type: varchar(255) }
    position:     { type: varchar(255), required: true }
    location:     { type: varchar(255), required: true }
    description:  { type: longvarchar, required: true }
    how_to_apply: { type: longvarchar, required: true }
    token:        { type: varchar(255), required: true, index: unique }
    is_public:    { type: boolean, required: true, default: 1 }
    is_activated: { type: boolean, required: true, default: 0 }
    email:        { type: varchar(255), required: true }
    expires_at:   { type: timestamp, required: true }
    created_at:   ~
    updated_at:   ~

  jobeet_affiliate:
    id:           ~
    url:          { type: varchar(255), required: true }
    email:        { type: varchar(255), required: true, index: unique }
    token:        { type: varchar(255), required: true }
    is_active:    { type: boolean, required: true, default: 0 }
    created_at:   ~

  jobeet_category_affiliate:
    category_id:  { type: integer, foreignTable: jobeet_category, foreignReference: id, required: true, primaryKey: true, onDelete: cascade }
    affiliate_id: { type: integer, foreignTable: jobeet_affiliate, foreignReference: id, required: true, primaryKey: true, onDelete: cascade }
tip
If you have decided to create the tables by writing SQL statements, you can
generate the corresponding schema.yml configuration file by running the
propel:build-schema task:
$ php symfony propel:build-schema
The above task requires that you have a configured database in databases.yml.
We show you how to configure the database in a later step. If you try and run this
task now it won't work as it doesn't know what database to build the schema for.
The schema is the direct translation of the entity relationship diagram in the YAML format.
The schema.yml file contains the description of all tables and their columns.
Each column is described with the following information:
type: The column type (boolean,tinyint,smallint,integer,bigint,double,float,real,decimal,char,varchar(size),longvarchar,date,time,timestamp,blob, andclob)required: Set it totrueif you want the column to be requiredindex: Set it totrueif you want to create an index for the column or touniqueif you want a unique index to be created on the column.primaryKey: Define a column as the primary key for the table.foreignTable,foreignReference: Define a column to be a foreign key to another table.
For columns set to ~, which means null in YAML (id, created_at, and
updated_at), symfony will guess the best configuration (primary key for id
and timestamp for created_at and updated_at).
note
The onDelete attribute defines the ON DELETE
behavior of foreign keys,
and Propel supports CASCADE, SETNULL, and RESTRICT. For instance, when
a job record is deleted, all the jobeet_category_affiliate related
records will be automatically deleted by the database or by Propel if the
underlying engine does not support this functionality.
The Database
The symfony framework supports all PDO-supported databases (MySQL, PostgreSQL, SQLite, Oracle, MSSQL, ...). PDO is the database abstraction layer|Database Abstraction Layer bundled with PHP.
Let's use MySQL for this tutorial:
$ mysqladmin -uroot -p create jobeet
Enter password: mYsEcret ## The password will echo as ********
note
Feel free to choose another database engine if you want. It won't be difficult to adapt the code we will write as we will use the ORM will write the SQL for us.
We need to tell symfony to use this database for the Jobeet project:
$ php symfony configure:database "mysql:host=localhost;dbname=jobeet" root mYsEcret
The configure:database task takes three arguments: the PDO DSN, the username, and the
password to access the database. If you don't need a password to access your
database on the development server, just omit the third argument.
note
The configure:database task stores the
database configuration into the
config/databases.yml configuration file. Instead of using the task, you can
edit this file by hand.
caution
Passing the database password on the command line is convenient but
insecure.
Depending on who has access to your environment, it might be better to
edit the config/databases.yml to change the password. Of course, to
keep the password safe, the configuration file access mode should also
be restricted.
The ORM
Thanks to the database description from the schema.yml file, we can use some
Propel built-in tasks to generate the SQL statements needed to create the
database tables:
$ php symfony propel:build --sql
The propel:build --sql task generates SQL statements in the data/sql/
directory, optimized for the database engine we have configured:
# snippet from data/sql/lib.model.schema.sql
CREATE TABLE `jobeet_category`
(
        `id` INTEGER  NOT NULL AUTO_INCREMENT,
        `name` VARCHAR(255)  NOT NULL,
        PRIMARY KEY (`id`),
        UNIQUE KEY `jobeet_category_U_1` (`name`)
)Type=InnoDB;
To actually create the tables in the database, you need to run the
propel:insert-sql task:
$ php symfony propel:insert-sql
tip
As for any command line tool, symfony tasks can take arguments
and options.
Each task comes with a built-in help message that can be displayed by running
the help task:
$ php symfony help propel:insert-sql
The help message lists all the possible arguments and options, gives the default values for each of them, and provides some useful usage examples.
The ORM also generates PHP classes that map table records to objects:
$ php symfony propel:build --model
The propel:build --model task generates PHP files in the lib/model/
directory that can be used to interact with the database.
By browsing the generated files, you have probably noticed that Propel generates
four classes per table. For the jobeet_job table:
JobeetJob: An object of this class represents a single record of thejobeet_jobtable. The class is empty by default.BaseJobeetJob: The parent class ofJobeetJob. Each time you runpropel:build --model, this class is overwritten, so all customizations must be done in theJobeetJobclass.JobeetJobPeer: The class defines static methods that mostly return collections ofJobeetJobobjects. The class is empty by default.BaseJobeetJobPeer: The parent class ofJobeetJobPeer. Each time you runpropel:build --model, this class is overwritten, so all customizations must be done in theJobeetJobPeerclass.
The column values of a record can be manipulated with a model object by using
some accessors (get*() methods) and mutators (set*() methods):
$job = new JobeetJob();
$job->setPosition('Web developer');
$job->save();

echo $job->getPosition();

$job->delete();
You can also define foreign keys directly by linking objects together:
$category = new JobeetCategory();
$category->setName('Programming');

$job = new JobeetJob();
$job->setCategory($category);
The propel:build --all task is a shortcut for the tasks we have run in this
section and some more. So, run this task now to generate forms and validators
for the Jobeet model classes:
$ php symfony propel:build --all --no-confirmation
You will see validators in action today and forms will be explained in great details on day 10.
The Initial Data
The tables have been created in the database but there is no data in them. For any web application, there are three types of data:
Initial data: Initial data are needed for the application to work. For example, Jobeet needs some initial categories. If not, nobody will be able to submit a job. We also need an admin user to be able to login to the backend.
Test data: Test Data are needed for the application to be tested. As a developer, you will write tests to ensure that Jobeet behaves as described in the user stories, and the best way is to write automated tests. So, each time you run your tests, you need a clean database with some fresh data to test on.
User data: User data are created by the users during the normal life of the application.
Each time symfony creates the tables in the database, all the data are lost. To
populate the database with some initial data, we could create a PHP script, or
execute some SQL statements with the mysql program. But as the need is quite
common, there is a better way with symfony: create YAML files in the
data/fixtures/ directory and use the propel:data-load task to load them into
the database.
First, create the following fixture files:
# data/fixtures/010_categories.yml
JobeetCategory:
  design:        { name: Design }
  programming:   { name: Programming }
  manager:       { name: Manager }
  administrator: { name: Administrator }

# data/fixtures/020_jobs.yml
JobeetJob:
  job_sensio_labs:
    category_id:  programming
    type:         full-time
    company:      Sensio Labs
    logo:         sensio-labs.gif
    url:          http://www.sensiolabs.com/
    position:     Web Developer
    location:     Paris, France
    description:  |
      You've already developed websites with symfony and you want to
      work with Open-Source technologies. You have a minimum of 3
      years experience in web development with PHP or Java and you
      wish to participate to development of Web 2.0 sites using the
      best frameworks available.
    how_to_apply: |
      Send your resume to fabien.potencier [at] sensio.com
    is_public:    true
    is_activated: true
    token:        job_sensio_labs
    email:        job@example.com
    expires_at:   2010-10-10

  job_extreme_sensio:
    category_id:  design
    type:         part-time
    company:      Extreme Sensio
    logo:         extreme-sensio.gif
    url:          http://www.extreme-sensio.com/
    position:     Web Designer
    location:     Paris, France
    description:  |
      Lorem ipsum dolor sit amet, consectetur adipisicing elit, sed do
      eiusmod tempor incididunt ut labore et dolore magna aliqua. Ut
      enim ad minim veniam, quis nostrud exercitation ullamco laboris
      nisi ut aliquip ex ea commodo consequat. Duis aute irure dolor
      in reprehenderit in.

      Voluptate velit esse cillum dolore eu fugiat nulla pariatur.
      Excepteur sint occaecat cupidatat non proident, sunt in culpa
      qui officia deserunt mollit anim id est laborum.
    how_to_apply: |
      Send your resume to fabien.potencier [at] sensio.com
    is_public:    true
    is_activated: true
    token:        job_extreme_sensio
    email:        job@example.com
    expires_at:   2010-10-10
note
The job fixture file references two images. You can download them
(/get/jobeet/sensio-labs.gif,
/get/jobeet/extreme-sensio.gif) and put them
under the web/uploads/jobs/ directory.
A fixtures file is written in YAML, and defines model objects, labelled with a
unique name (for instance, we have defined two jobs labelled job_sensio_labs
and job_extreme_sensio). This label is of great use to link related objects
without having to define primary keys (which are often
auto-incremented and cannot be set). For instance, the job_sensio_labs job
category is programming, which is the label given to the 'Programming'
category.
tip
In a YAML file, when a string contains line breaks (like the description
column in the job fixture file), you can use the pipe (|) to indicate that
the string will span several lines.
Although a fixture file can contain objects from one or several models, we have decided to create one file per model for the Jobeet fixtures.
tip
Notice the numbers prefixing the filenames. This is a simple way to control the order of data loading. Later in the project, if we need to insert some new fixture file, it will be easy as we have some free numbers between existing ones.
In a fixture file, you don't need to define all columns values. If not, symfony
will use the default value defined in the database schema. And as symfony uses
Propel to load the data into the database, all the built-in
behaviors (like automatically setting the created_at or
updated_at columns) and the custom behaviors you might have added to the model
classes are activated.
Loading the initial data into the database is as simple as running the
propel:data-load task:
$ php symfony propel:data-load
tip
The propel:build --all --and-load task is a shortcut for the propel:build --all task followed by the propel:data-load task.
See it in Action in the Browser
We have used the command line interface a lot but that's not really exciting, especially for a web project. We now have everything we need to create Web pages that interact with the database.
Let's see how to display the list of jobs, how to edit an existing job, and how to delete a job. As explained during the first day, a symfony project is made of applications. Each application is further divided into modules. A module is a self-contained set of PHP code that represents a feature of the application (the API module for example), or a set of manipulations the user can do on a model object (a job module for example).
Symfony is able to automatically generate a module for a given model that provides basic manipulation features:
$ php symfony propel:generate-module --with-show --non-verbose-templates frontend job JobeetJob
The propel:generate-module generates a job module in the frontend
application for the JobeetJob model. As with most symfony tasks, some files
and directories have been created for you under the apps/frontend/modules/job/
directory:
| Directory | Description |
|---|---|
actions/ |
The module actions |
templates/ |
The module templates |
The actions/actions.class.php file defines all the available action for the job module:
| Action name | Description |
|---|---|
index |
Displays the records of the table |
show |
Displays the fields and their values for a given record |
new |
Displays a form to create a new record |
create |
Creates a new record |
edit |
Displays a form to edit an existing record |
update |
Updates a record according to the user submitted values |
delete |
Deletes a given record from the table |
You can now test the job module in a browser:
http://www.jobeet.com.localhost/frontend_dev.php/job

If you try to edit a job, you will have an exception because symfony needs a
text representation of a category. A PHP object representation can be defined
with the PHP __toString() magic method. The text representation of a category
record should be defined in the JobeetCategory model class:
// lib/model/JobeetCategory.php
class JobeetCategory extends BaseJobeetCategory
{
  public function __toString()
  {
    return $this->getName();
  }
}
Now each time symfony needs a text representation of a category, it calls the
__toString() method which returns the category name. As we will need a text
representation of all model classes at one point or another, let's define a
__toString() method for every model class:
// lib/model/JobeetJob.php
class JobeetJob extends BaseJobeetJob
{
  public function __toString()
  {
    return sprintf('%s at %s (%s)', $this->getPosition(), $this->getCompany(), $this->getLocation());
  }
}

// lib/model/JobeetAffiliate.php
class JobeetAffiliate extends BaseJobeetAffiliate
{
  public function __toString()
  {
    return $this->getUrl();
  }
}
You can now create and edit jobs. Try to leave a required field blank, or try to enter an invalid date. That's right, symfony has created basic validation rules by introspecting the database schema.
Final Thoughts
That's all. I have warned you in the introduction. Today, we have barely written PHP code but we have a working web module for the job model, ready to be tweaked and customized. Remember, no PHP code also means no bugs!
If you still have some energy left, feel free to read the generated code for the module and the model and try to understand how it works. If not, don't worry and sleep well, as tomorrow we will talk about one of the most used paradigm in web frameworks, the MVC design pattern.
This work is licensed under the Creative Commons Attribution-Share Alike 3.0 Unported License license.